Custom color palettes
Parts have always been assigned colors based on their part IDs. The colors used have been selected so that there is contrast between parts, making it easy to see the individual parts in a mesh. It has always been possible to change the colors assigned to a part if you have other preferences. The colors assigned are stored in a file called colors.json. The way to re-use the colors from one model to another have been to copy this colors.json file around, either manually or by importing and exporting in the GUI.
However, this has not been a very smooth process. The GUI would not keep track of your preferred colors, you had to keep track of the colors.json files yourself. And it was not possible to change the default colors used.
This has now changed. GUI 7.0.12 introduces the possibility to customize palettes, specify which to use as default and easily switch between different palettes.
Creating a custom palette
To get started, click on the Configure button in Assemble or Post and navigate to the Colors page.
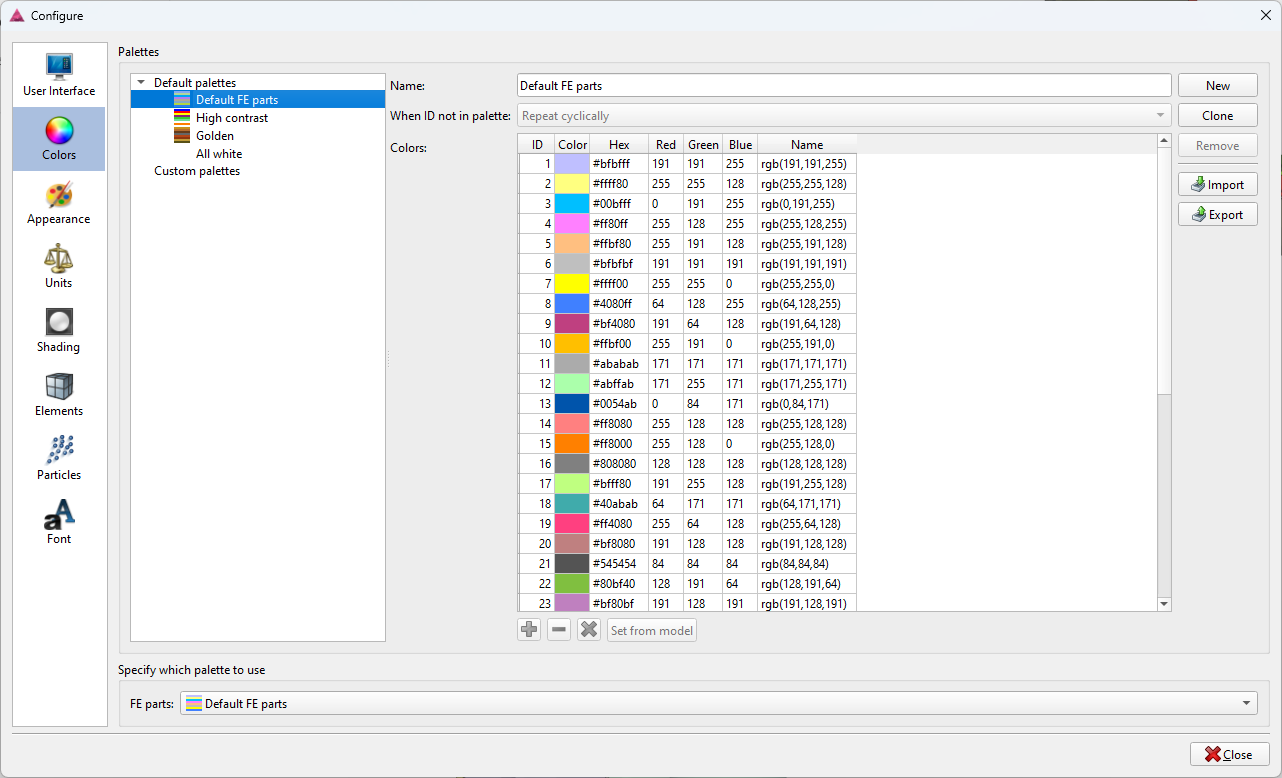
As you can see, there are four built-in palettes ready for use. The Default FE parts palette is the color palette that has previously been used for all models. It is still the default one, but you can change that in the combo-box at the bottom of the dialog. If you change the default palette, all new models you open will use that palette. Existing models will not be affected, as they already have the colors.json file.
You can easily create your own palettes by either clicking New or Clone and then modify the colors in the table. As an example, click on the All white palette, then Clone and change the name to ‘Chess’. Then click the ‘+’ button to add another color and select Black. You can also double click on the color column to open a color picker dialog, or manually type in the red, green and blue values if you know the exact color value. You now have a palette that will cyclically set odd parts to white and even parts to black.

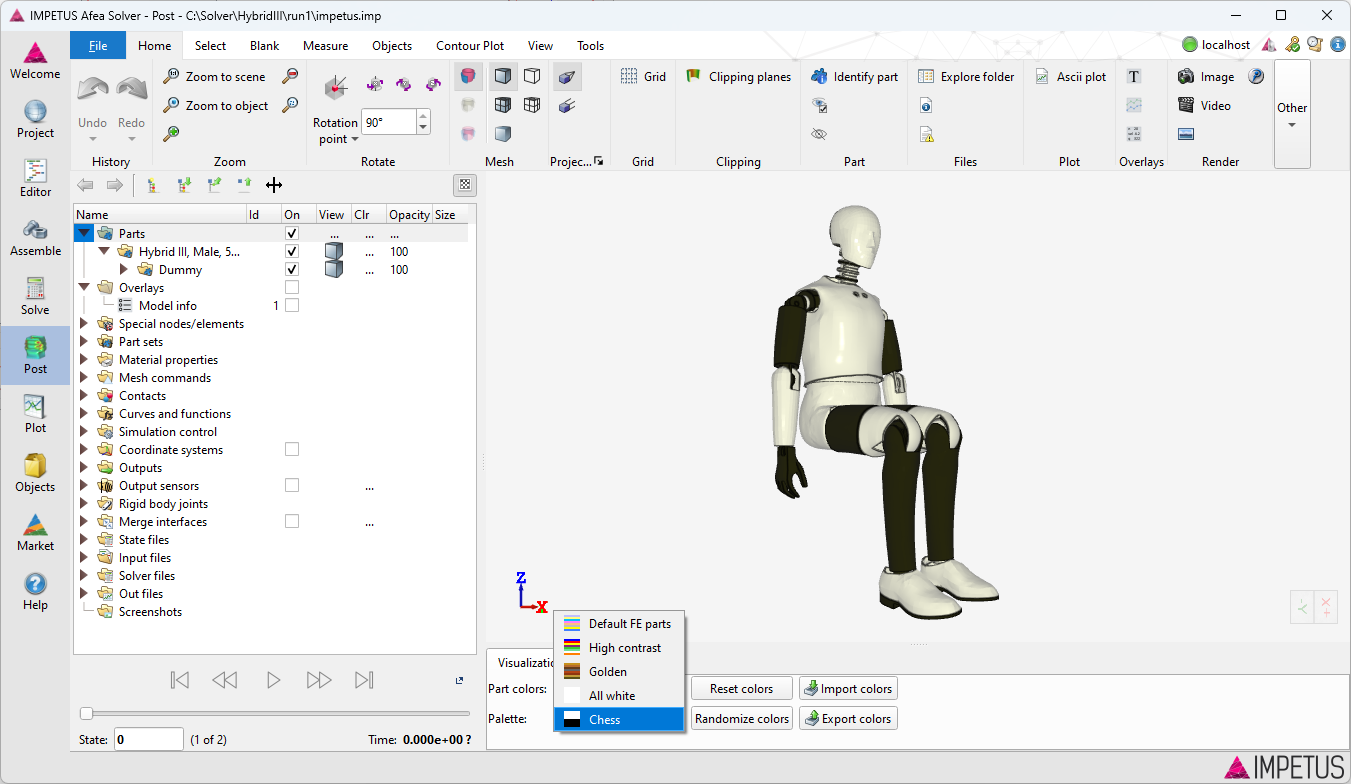
To change the palette used on a model, click on the Parts item and change the palette used. Note that the list of available palettes includes both the built-in ones and your custom chess palette.
Creating a custom palette from a model
Now say you use the same part IDs over and over, and you want to assign some nice colors that you want to reuse in many models. You start by changing the part colors to your preferences. A tip if you want to assign the same color to different parts is to right click on a part, click Copy color and then right click on the other part and Paste color.
To create a reusable palette from these tediously set colors, go to the Colors page in the Configure dialog. Create a new palette and click Set from model. This will import the part IDs and the corresponding colors into the palette table. You should give the palette a relevant name.
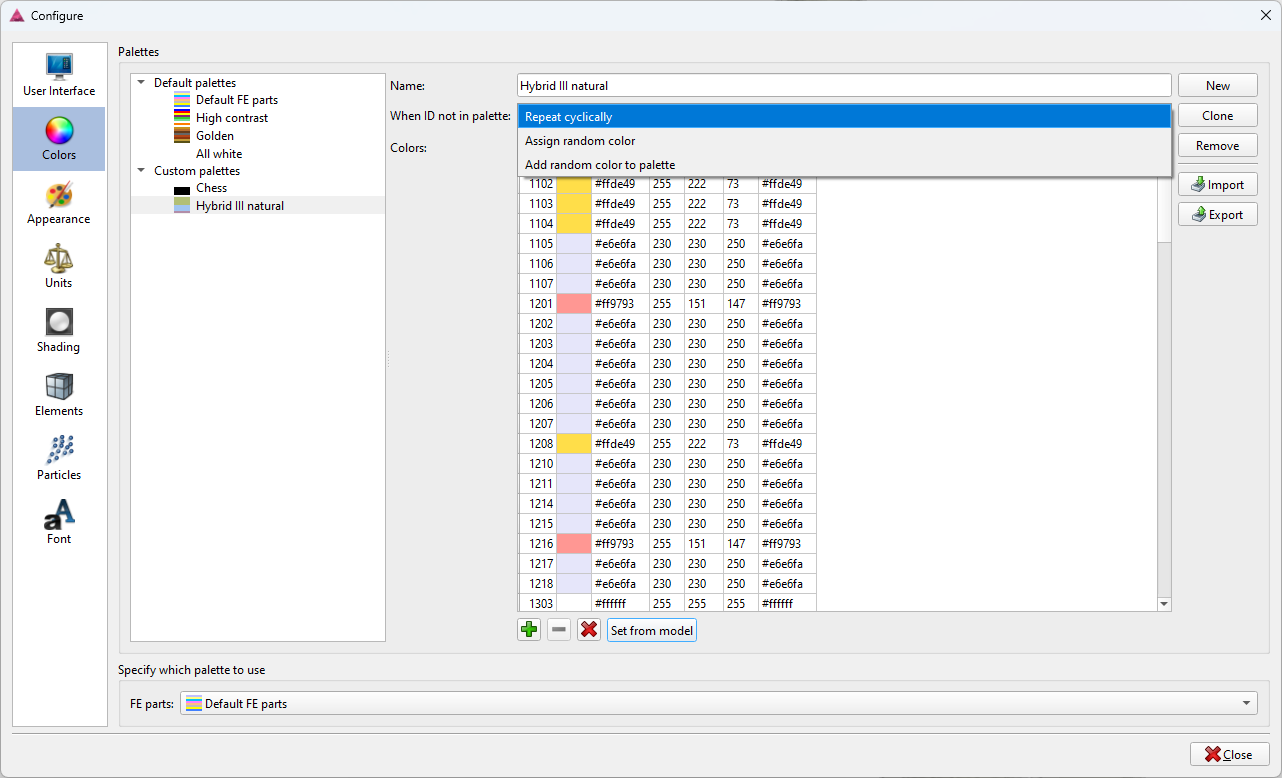
Note that there is a combo-box where you can specify what should happen if you use the palette on a model with other part IDs. The default behavior for the built-in palettes is to repeat the colors cyclically, as we saw in the chess palette example. But in a case like this, it is probably better to assign random colors. If you select ‘Assign random color’, part IDs not specified in the palette will be given a random color, but the palette itself will not be modified. When you use it on another model, new random colors will be assigned. ‘Add random color to palette’ behaves the same, only that the random colors are added to the palette and will thus not be reassigned later.
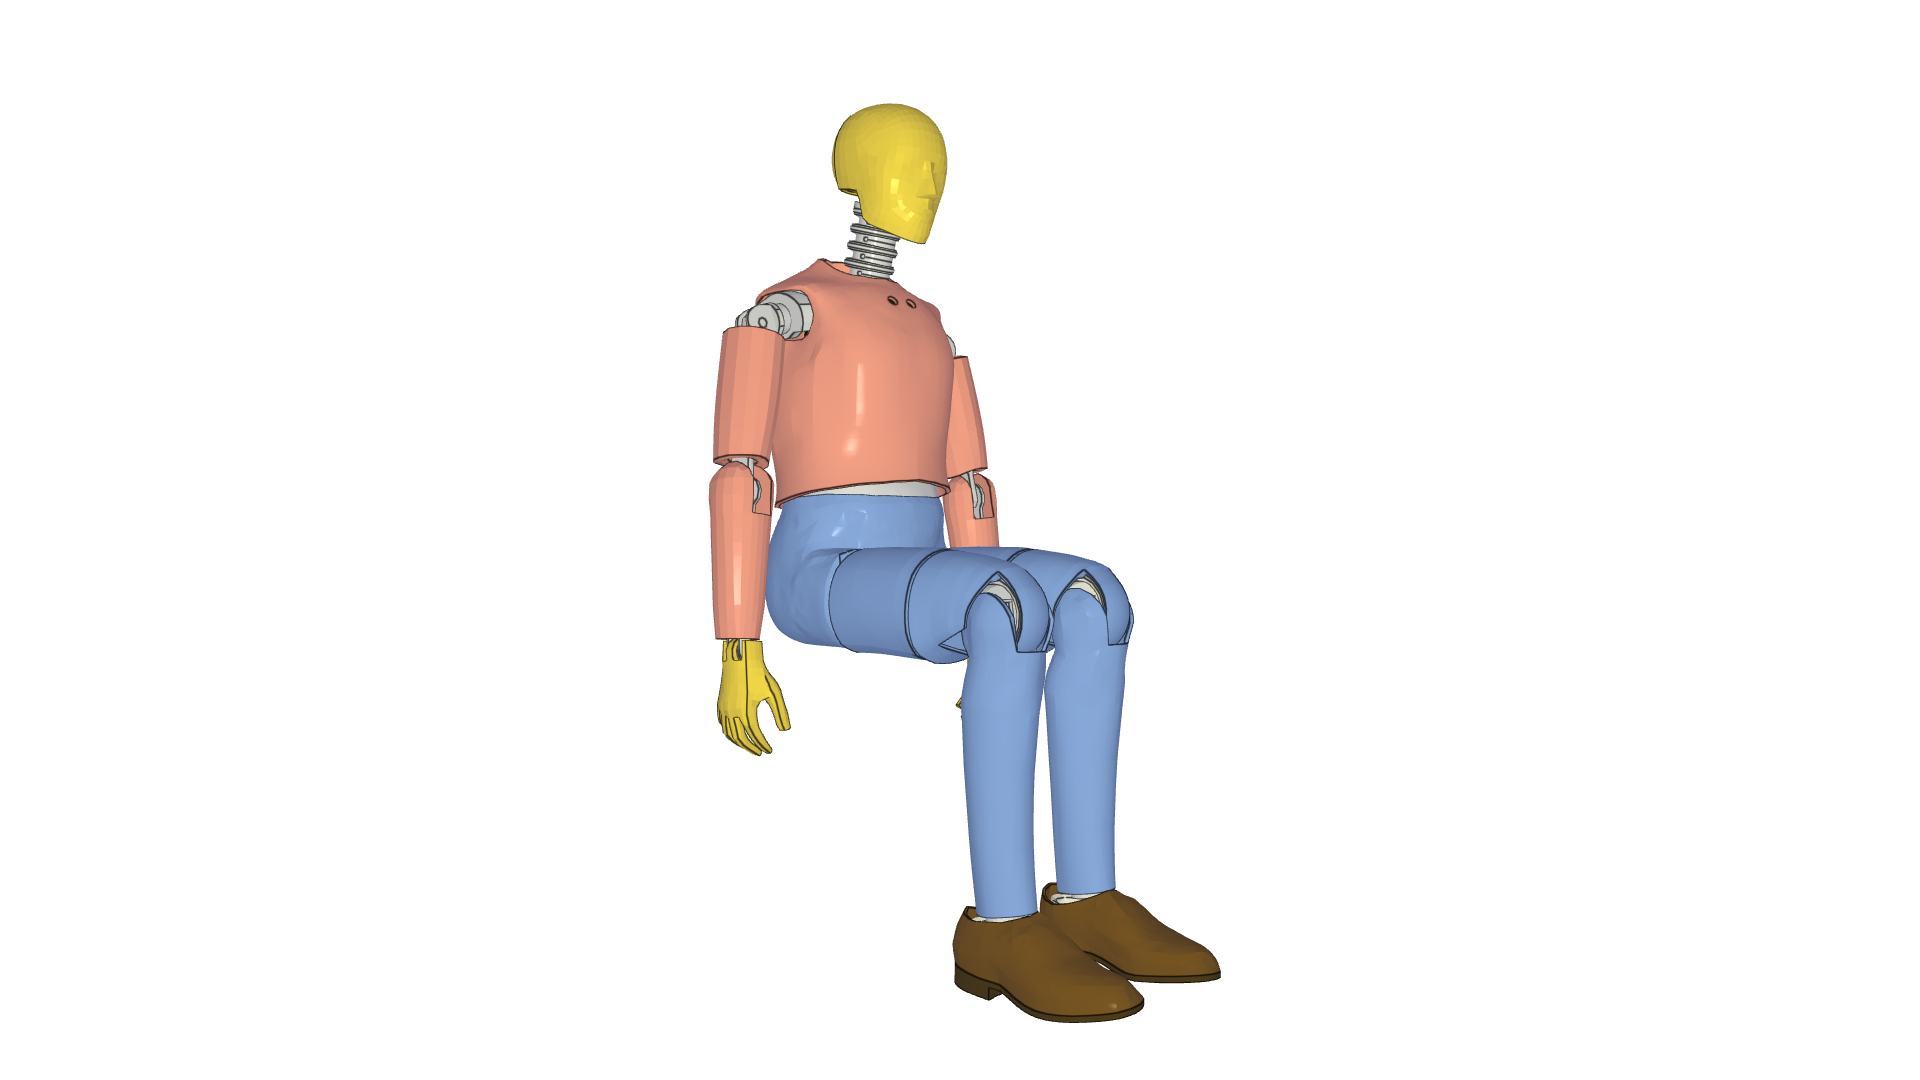
To see that it works, we open another model and assign our custom palette to it.